Enhance Your Concrete with Exposed Aggregate Overlay
If you’re looking to upgrade your outdoor spaces without breaking the bank, there’s a solution that combines durability and style. Modern decorative concrete techniques let you revitalize worn driveways, patios, or pool decks with a fresh, textured finish. This method delivers professional-grade results while avoiding the hassle and expense of full replacements.
This guide walks you through the process of transforming plain slabs into eye-catching surfaces. You’ll learn how to create slip-resistant textures that handle heavy foot traffic and weather extremes. Best of all, these upgrades boost your property’s curb appeal and resale value with minimal effort.
Whether you’re tackling a DIY project or hiring a pro, we’ll break down each step clearly. From material selection to final sealing, you’ll gain the knowledge to make informed decisions. Let’s explore how this approach balances practicality with design flexibility for lasting results.
Key Takeaways
- Cost-effective alternative to replacing entire concrete slabs
- DIY-friendly process with professional-looking outcomes
- Increases slip resistance and weather durability
- Works for driveways, walkways, patios, and pool decks
- Enhances property value through improved aesthetics
Introduction to Exposed Aggregate Overlay
Transform tired concrete into stunning features using a technique that layers beauty over durability. This method breathes new life into worn slabs by adding a thin, custom-designed top coat. It’s ideal for updating driveways, patios, or pool decks while preserving structural integrity.
What It Is and How It Works
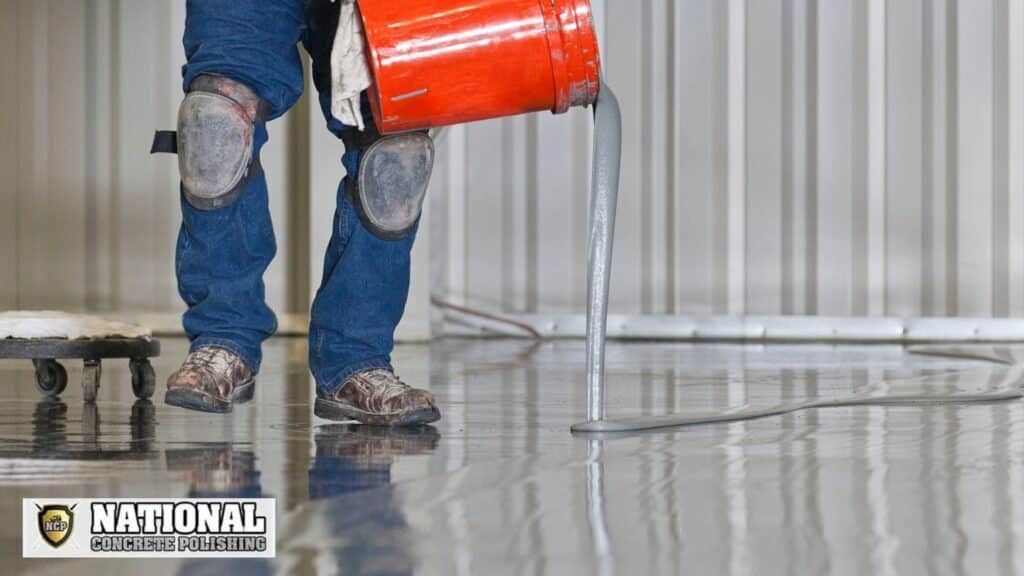
The system uses a specialized mixture applied directly to cleaned surfaces. A blend of cement, sand, and bonding polymers creates a strong adhesive layer. Contractors then spread decorative stones or glass chips across the wet surface before finishing.
| Feature | Traditional Concrete | Overlay System |
|---|---|---|
| Installation Time | 5-7 days | 2-3 days |
| Material Costs | $6-$10/sq ft | $3-$8/sq ft |
| Design Options | Limited colors | Custom textures/colors |
An Overview of the Decorative Technique
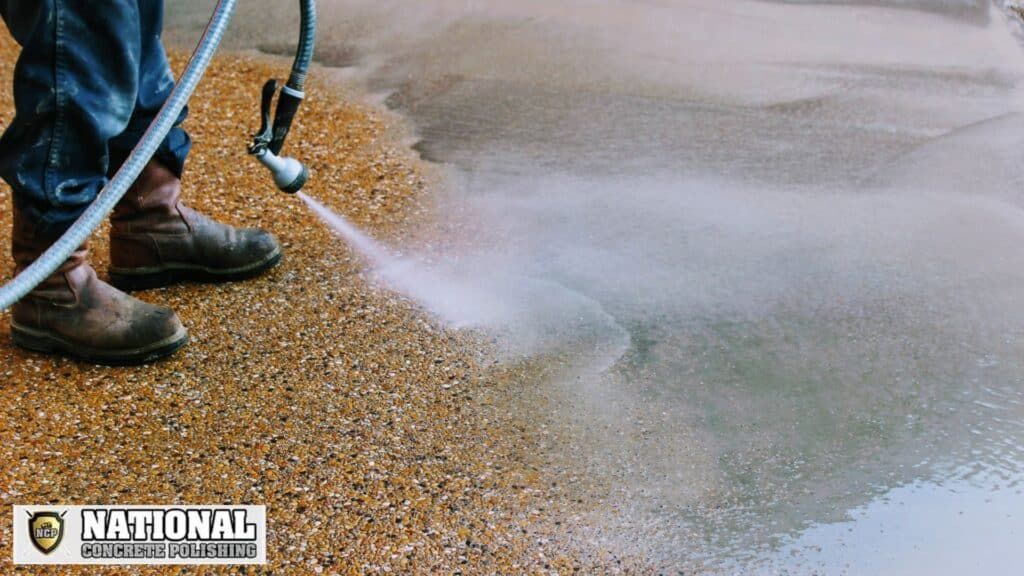
After applying the base layer, professionals expose the decorative elements through controlled washing or brushing. This reveals natural stone textures that improve traction and visual interest. The final sealed surface resists stains, UV damage, and freeze-thaw cycles.
Choose from materials like crushed granite or colored quartz to match your landscape design. Polymer-enhanced mixtures ensure lasting adhesion without cracking. This approach skips demolition costs while delivering upgraded performance.
Benefits of Exposed Aggregate Overlay
Revitalizing existing surfaces offers smart advantages beyond basic repairs. This resurfacing method strengthens worn areas while adding visual character to your property. Homeowners gain lasting performance upgrades without the mess of full demolition.
Enhanced Durability and Aesthetic Appeal
Your surfaces become tougher against daily wear. The system bonds tightly to old slabs, creating a unified structure that handles heavy use. Rain, snow, and UV rays cause less damage compared to standard finishes.
Design flexibility lets you choose colors and textures matching your home’s style. Natural stone patterns create visual depth while improving traction. These upgrades boost curb appeal, often increasing resale value.
Cost-Effectiveness for Your Project
Skip the high expenses of tearing out and replacing old slabs. This approach uses existing foundations, cutting material needs by over 60%. You save on labor costs since crews work faster compared to full installations.
| Factor | Traditional Replacement | Resurfacing Method |
|---|---|---|
| Project Duration | 7-10 days | 2-4 days |
| Maintenance Frequency | Annual sealing | Every 3-5 years |
| Surface Lifespan | 15-20 years | 25+ years |
Long-term savings come from reduced repair needs. The sealed finish resists stains and cracks, requiring simple cleaning instead of frequent fixes. Commercial properties benefit from minimal downtime during installations.
Preparing Your Existing Concrete Surface
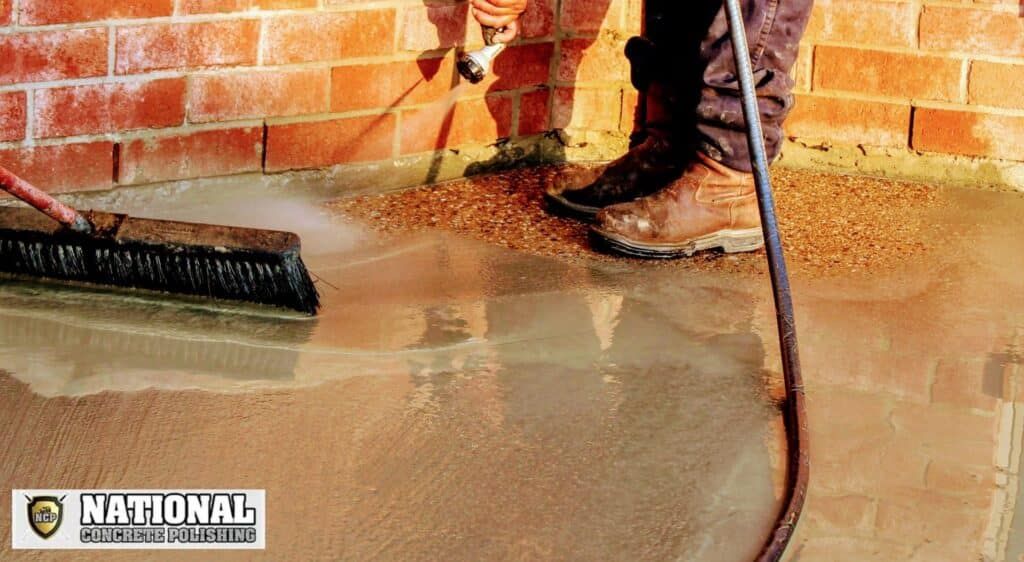
Proper groundwork determines your project’s longevity. Before enhancing your space, you’ll need to transform worn slabs into pristine canvases. This phase ensures your decorative finish bonds securely and performs for decades.
Cleaning and Dirt Removal Essentials
Start by sweeping loose debris with stiff-bristle brooms. Vacuum fine particles using industrial-grade equipment. For stubborn grime, apply heated pressure washing (1800-3000 PSI) with biodegradable cleaners.
Target oil stains with citrus-based degreasers. Let solutions soak for 15 minutes before scrubbing. Rinse thoroughly until water sheets evenly across the surface – this confirms proper contaminant removal.
Repairing Cracks and Assessing Surface Stability
Inspect your slab for structural flaws. Use diamond-tipped blades to widen hairline cracks into V-shaped grooves. This creates space for epoxy fillers to bond effectively.
- Perform pull-off tests to measure bond strength
- Conduct shear tests on corners and edges
- Check moisture levels with plastic sheet tests
Address temperature swings by working in 50-90°F conditions. High humidity? Allow extra drying time between cleaning and repairs. These steps prevent adhesion failures and ensure seamless material integration.
Exposed Aggregate Overlay Process
Achieving a stunning surface upgrade involves precise execution of specialized methods. This approach blends technical skill with artistic control to create durable, textured finishes. Let’s explore the core stages that transform ordinary slabs into custom-designed masterpieces.
Mixing and Application Techniques
Start by combining cement, sand, and bonding polymers in a 3:2:1 ratio. Add natural stones like basalt or quartz gradually while mixing. The ideal consistency resembles thick pancake batter – wet enough to spread smoothly but firm enough to hold shape.
Use rubber squeegees to apply the mixture in 3/8″ layers. Work in small sections, maintaining even pressure for uniform thickness. Professionals often use magnesium floats for final smoothing, creating optimal surfaces for aggregate exposure.
Exposing Aggregates for Visual Impact
Timing proves critical here. Wait until the material firms up slightly but remains pliable – typically 45-90 minutes after application. Gently spray water while scrubbing with stiff brushes to remove surface mortar. This reveals about one-third of the stones’ depth, creating natural texture variations.
Step-by-Step Installation Guidelines
- Prepare surfaces using diamond grinders for maximum adhesion
- Mix materials in batches small enough to apply within 20 minutes
- Work against the sun’s path to control drying rates
- Seal cured surfaces after 72 hours using penetrating acrylic formulas
Adjust your workflow based on weather conditions. High humidity? Extend curing time by 25%. Hot climates? Mist the surface periodically to prevent rapid drying. These adaptations ensure professional results regardless of environmental challenges.
Customizing Your Aggregate Surface
Your concrete becomes a design canvas when exploring personalization options. Choose textures and hues that align with your property’s architecture while improving functionality. This stage turns ordinary slabs into tailored features that reflect your style.
Selecting Materials for Visual Harmony
Natural stones like quartz and basalt offer distinct textures. Larger pieces create dramatic patterns, while smaller ones provide refined finishes. Consider how each material affects slip resistance – rough textures work well near pools, smoother blends suit patio seating areas.
Color Techniques for Lasting Beauty
Acid stains react chemically with concrete to produce earthy, marble-like effects. These organic variations hide minor wear over time. Polymer-based alternatives penetrate deeper, offering fade-resistant shades from bold reds to subtle grays.
| Method | Appearance | Durability |
|---|---|---|
| Acid Staining | Natural variations | 10-15 years |
| Polymer Staining | Uniform tones | 20+ years |
Combine multiple stone sizes with complementary stains for unique designs. Professionals often mix granite chips with blue-gray polymers for coastal themes. Your choices impact long-term upkeep – darker colors hide stains better, while light tones brighten shaded areas.
Maintenance and Protection of Your Surface
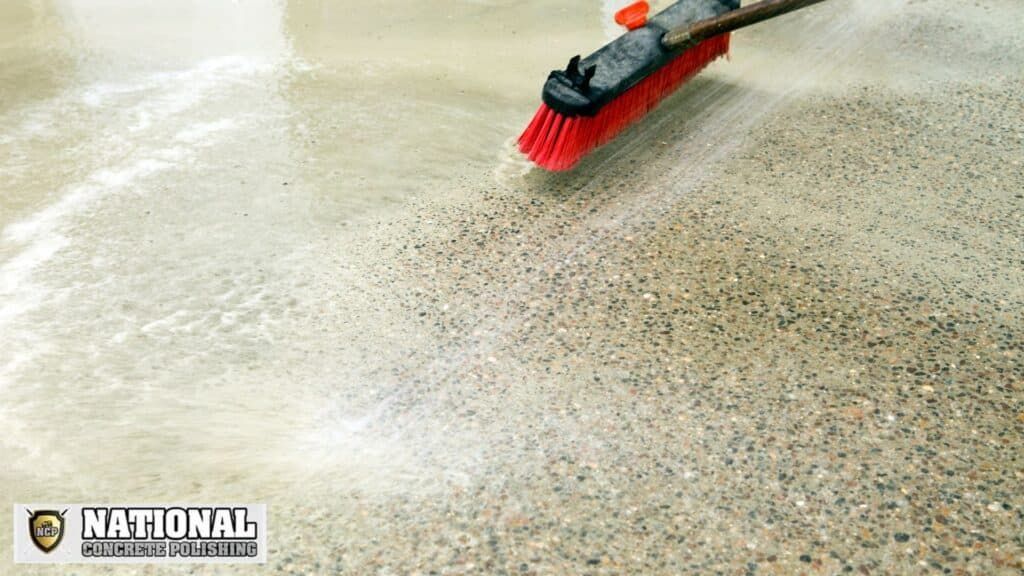
Protecting your upgraded surfaces ensures lasting beauty and performance. A smart care routine prevents wear while keeping your spaces looking fresh. Follow these proven methods to maintain both function and style.
Regular Cleaning and Upkeep Strategies
Sweep your concrete weekly using stiff-bristle brooms. This removes grit that scratches the surface over time. For deeper cleaning, use garden hoses with fan-spray nozzles every 3-6 months.
Treat spills immediately with pH-neutral cleaners. For oil stains, apply baking soda paste overnight before scrubbing. Avoid harsh chemicals that strip protective sealants.
| Cleaning Method | Frequency | Best For |
|---|---|---|
| Dry Sweeping | Weekly | Dust/debris removal |
| Pressure Washing | Biannually | Deep cleaning |
| Spot Treatment | As needed | Stain removal |
Sealing Techniques for Long-Term Durability
Apply penetrating sealers every 2-3 years. These formulas protect against moisture and UV damage without changing surface texture. Choose breathable acrylics for areas with freeze-thaw cycles.
Inspect your concrete seasonally for cracks or discoloration. Address minor issues quickly to avoid costly resurfacing. Proper care extends your surface’s lifespan by decades while preserving its visual appeal.
Project Planning and Materials Overview
Smart preparation separates successful projects from costly setbacks. Gathering the right tools and materials upfront ensures smooth execution and professional-grade results. This phase determines how well your surface withstands daily use and weather challenges.
Essential Tools and Materials
Your material list starts with polymer-modified resurfacing products designed for adhesion and flexibility. Bonding agents create a secure base, while mixing tools like paddle mixers ensure consistent texture. Professional-grade squeegees and trowels help achieve uniform thickness during application.
Surface preparation demands diamond grinders and pressure washers (3000+ PSI). These tools remove contaminants and create optimal texture for material bonding. Finishing equipment includes sprayers for sealants and edging tools for crisp borders.
Leveraging Local Expertise
National Concrete Polishing offers specialized guidance for South Florida projects. Their team at +1 877-661-7562 helps select products suited to regional humidity and salt air conditions. They assess existing slabs to recommend compatible resurfacing systems.
Local professionals understand municipal codes affecting driveway slopes and pool deck textures. Their knowledge prevents material mismatches that lead to peeling or discoloration. This expertise proves crucial when balancing aesthetic goals with long-term durability needs.
| Planning Factor | DIY Approach | Professional Support |
|---|---|---|
| Material Selection | Trial and error | Tested combinations |
| Climate Adaptation | Generic solutions | Custom formulations |
| Code Compliance | Potential violations | Guaranteed adherence |
Conclusion
Upgrading your property’s surfaces becomes a strategic investment when using decorative resurfacing methods. This method revitalizes existing slabs with fresh textures and colors while avoiding full replacements. You save time and money while gaining surfaces that handle heavy use and harsh weather.
The process offers endless design flexibility through stone selections and staining techniques. Proper installation creates slip-resistant areas that complement your home’s architecture. With routine care, these finishes maintain their appeal for decades, outperforming traditional options.
South Florida homeowners can access expert guidance through National Concrete Polishing at +1 877-661-7562. Their team helps tailor solutions for local climate challenges and design preferences. Your upgraded surfaces will deliver lasting value through enhanced durability and visual impact.
FAQ
How does this decorative layer differ from traditional resurfacing?
Unlike standard methods, this technique embeds materials like stones or glass into a cement base. It creates a textured, slip-resistant finish with visual depth. The process preserves existing slabs while adding modern style.
What advantages does this method offer compared to full replacement?
You save up to 50% by avoiding demolition costs. It strengthens worn slabs, resists heavy foot traffic, and offers customizable designs. Colors and textures can mimic natural stone without the premium price.
Can you apply it over surfaces with existing damage?
Minor cracks or spalling can be repaired before application. Professionals assess structural stability first. Severely compromised areas may need partial replacement for optimal adhesion.
How long does the installation process typically take?
Most residential projects take 2–4 days, including prep work and curing. Larger commercial areas might require a week. Weather and material choice affect timelines—polymers cure faster than standard mixes.
Are there limitations on color combinations or textures?
You choose from quartz, granite, or recycled glass in multiple hues. Acid stains add secondary tones, while sealers enhance gloss. Samples from suppliers like Brickform or Solomon Colors help visualize results.
What maintenance ensures long-lasting results?
Sweep weekly and pressure-wash quarterly. Reseal every 2–3 years with products like Prosoco’s Lithi-Tek or Euclid Chemical’s Armor SC25. Avoid harsh deicers to prevent surface erosion.
Which tools are essential for a DIY attempt?
Rent a concrete mixer, bull float, and sprayer. Purchase quality trowels, edgers, and protective gear. For consistent texture, use a surface retarder from brands like Dayton Superior or WR Meadows.
How does cost compare to stamped or polished finishes?
Expect – per square foot installed—more affordable than stamped (–) or polished (–). Savings come from reduced labor and material waste. Custom aggregates may increase pricing slightly.
Why is sealing critical after installation?
Sealants block oil spills, UV fading, and moisture penetration. They enhance color vibrancy and simplify cleaning. Brands like Curecrete Distribution offer hybrid formulas that combine protection with a natural matte look.
Can this be used for vertical surfaces like walls?
Yes—specialized polymer-modified mixes from Lafarge Holcim or Sika Corporation adhere to vertical planes. Application requires spray techniques and shorter working times to prevent sagging.

